
POROSITY CHECK AND WATER PISTON POROSIMETER
1. Basic principles
2. Waper piston porosimeter
3. A practical porosimeter
4. Corrections by temperature and atmosferic pressure or altitude
5. References
2. Waper piston porosimeter
3. A practical porosimeter
4. Corrections by temperature and atmosferic pressure or altitude
5. References
The measure of the porosity of paragliding tissue has standardized on the following concept:
"Measure the time of passage in seconds of 250 ml of air through 38,5 cm2 of area on 10 mbar pressure".
Ie, porosity check measures the time required for a given volume of air passing through the portion of the tissue to check. Similarly, you could check the amount of air that passes through the tissue at a fixed time. However, commercial porosimeters, like the JDC Skywach MK-1, uses the practical principle of counting the time.
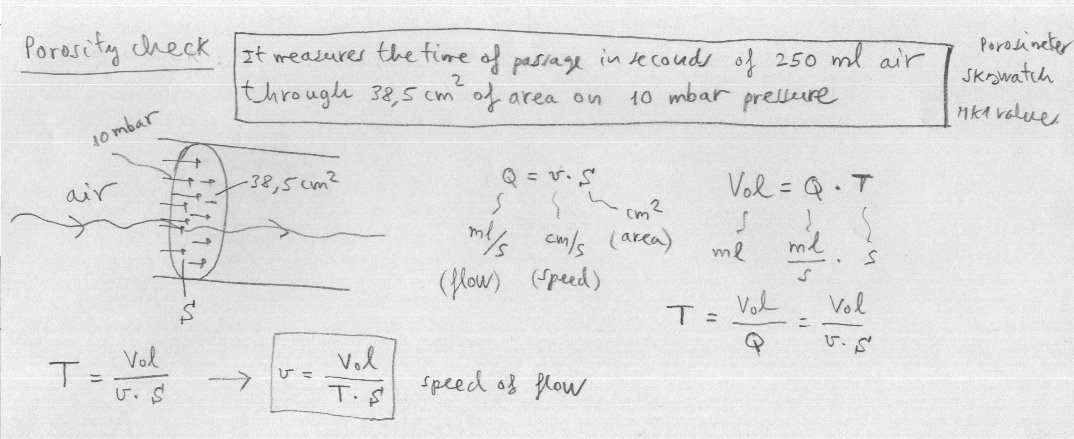
Fig. 1. A volume of air V passes through a porous surface of fabric S at a time T, with a flow rate Q and at a speed v,
according to the mathematical relationships indicated.
2. Water piston porosimeter
According to the above principle, it is possible to design a high precision porosimeter, using very simple materials, and based on the suction created by raising a cylinder inside a water tank. The first explanation that I saw on this method you can find here: http://pg.c2.hu/articles/Szakirodalom/Szakcikkek/Porosity_check/Porosity_check.html
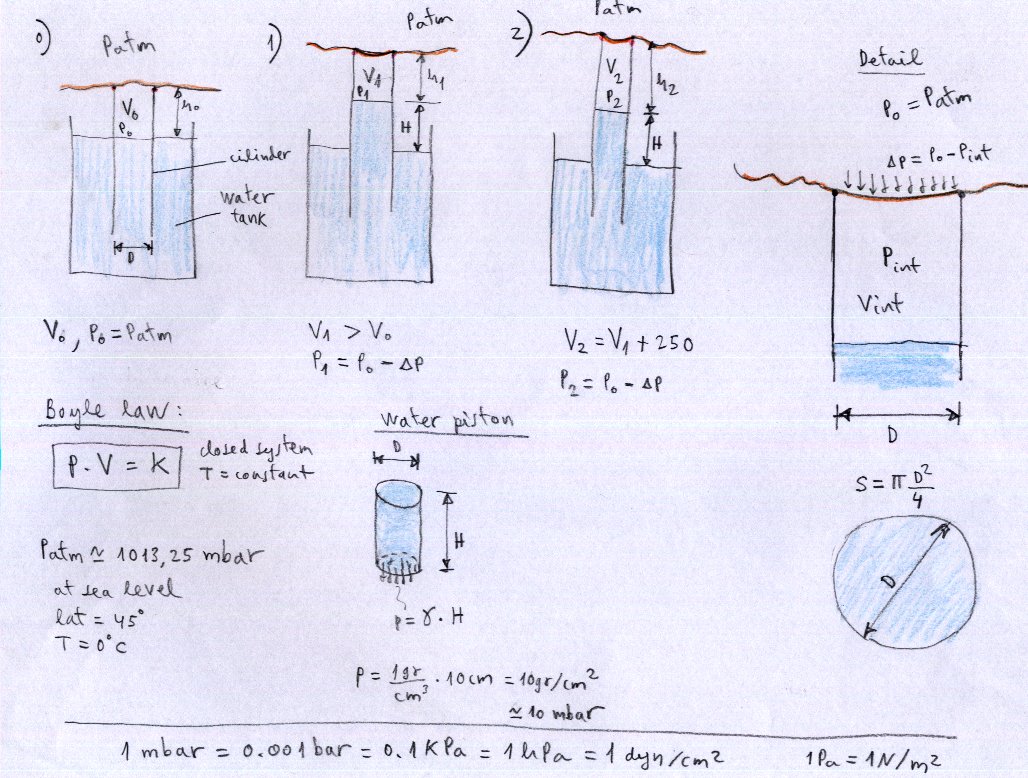
Fig. 2 Water piston porosimeter
0) Suppose a cylinder of inner diameter D, and submerged in a water tank and closed at the top with the cloth to check. The volume of air inside is Vo and the external and internal pressure is Po=Patm , equals the atmospheric pressure at the measurement site.
1) Lifting the cylinder height H, the internal pressure drops to a value exactly equal in mb to the cm of elevation (10 cm = 10 mbar). Due to the difference in pressure (10 mbar greater on the outside of the cylinder) begins to enter a flow of air into the cylinder.
3) Maintaining constant height of 10 cm of water (10 mbar), the experiment ends when the volume of air that has entered inside the cylinder is exactly 250 ml (250 cm3). V2=V1+250ml. The result of the experiment is the time required for filling of 250 ml of air.
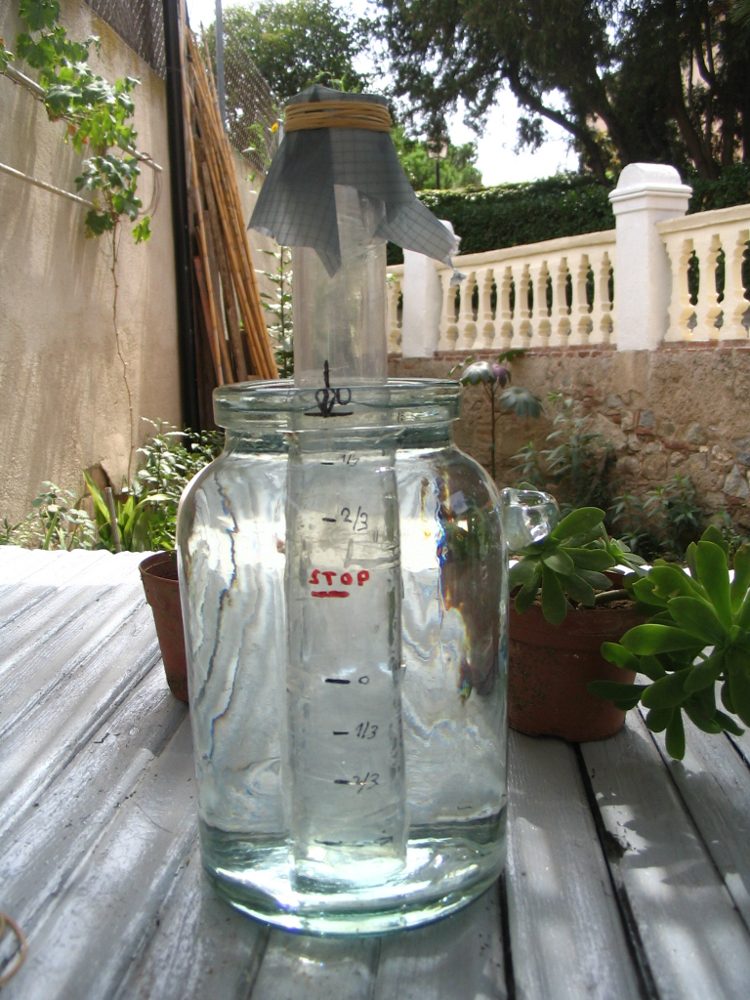
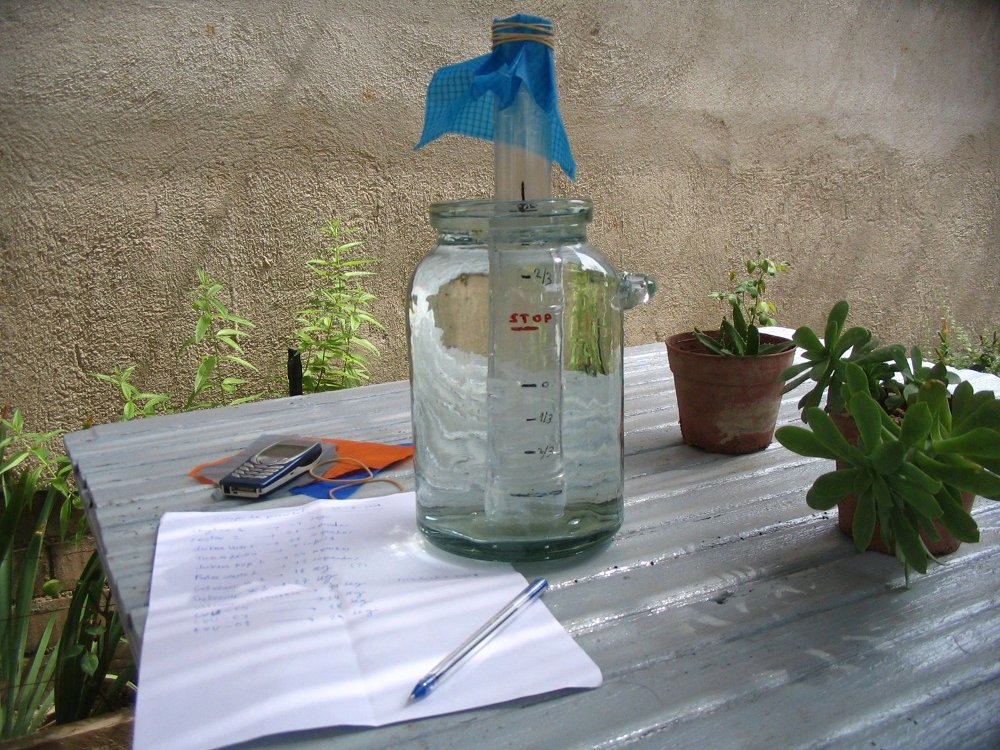
3. Practical porosimeter
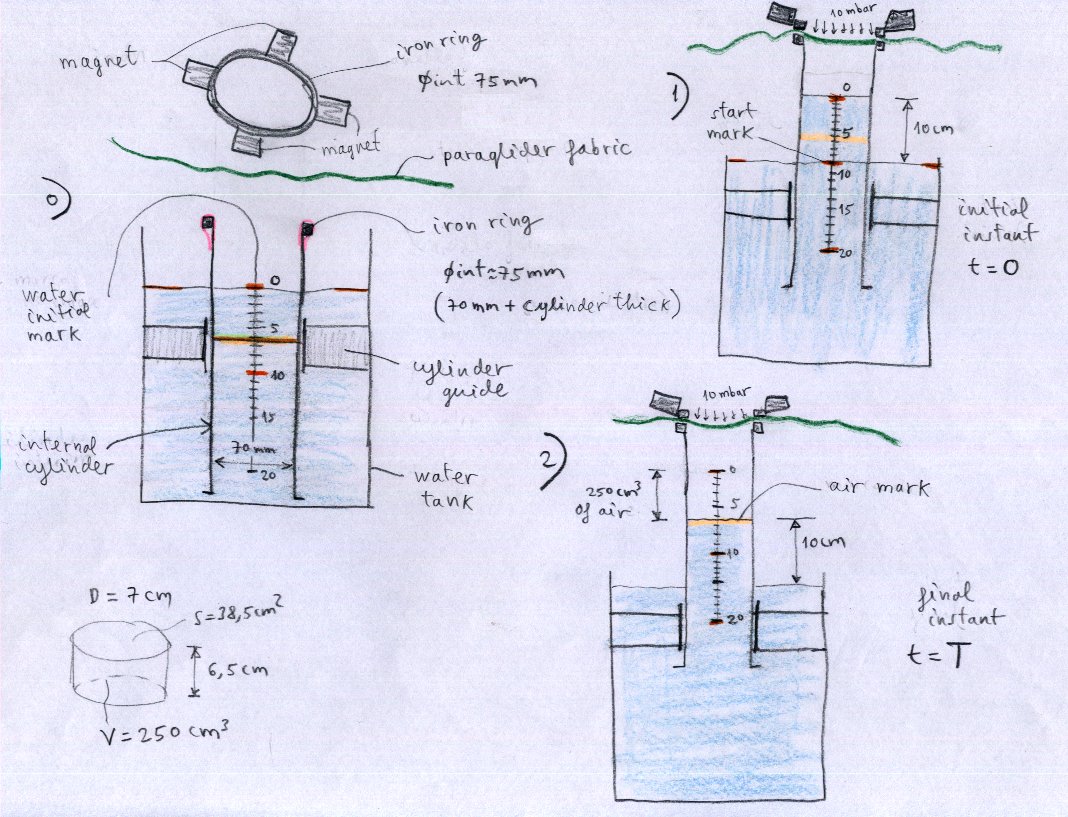
Fig. 3. The drawings above show how to build a water piston porosimeter.
It is important to note that the cylinder may have an internal diameter different of 70 mm, while retaining the level of indoor air at 6.5 cm, for consistency with the experiment. For example, you could use a cylinder with a double surface, and then the volume of air that ends with the experiment is 500 ml. For other areas, the volume will vary proportionally.
Interpretation of test results, time in seconds:
>200 s new
70-200 s good condition
25-70 s used
18-25 s heavily used
<18 s not flyable
Such porosimeter has been successfully pioneered by my colleague Juan Salvadori (CZ Wings Aero-velería), who has built several models. In particular its construction was necessary during the construction of the prototype nº1 of the Ascender, due to the use of kite ripstop fabric, with no precise data from the manufacturer. The results were very similar to those of Skytex.
 Porosimeter CZWings (version 2008) |
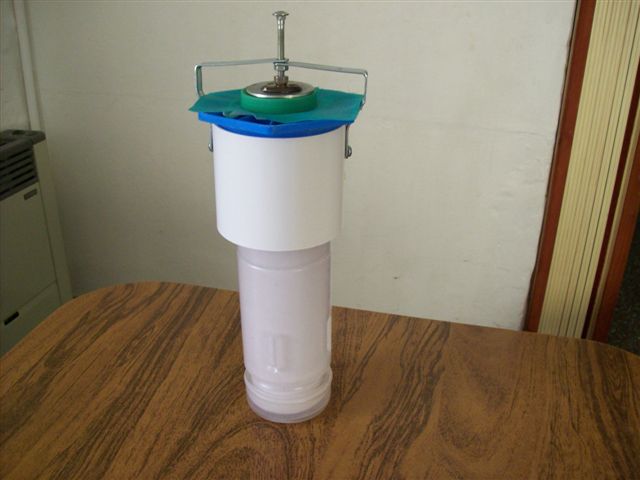 Porosimeter CZWings (version 2008) |
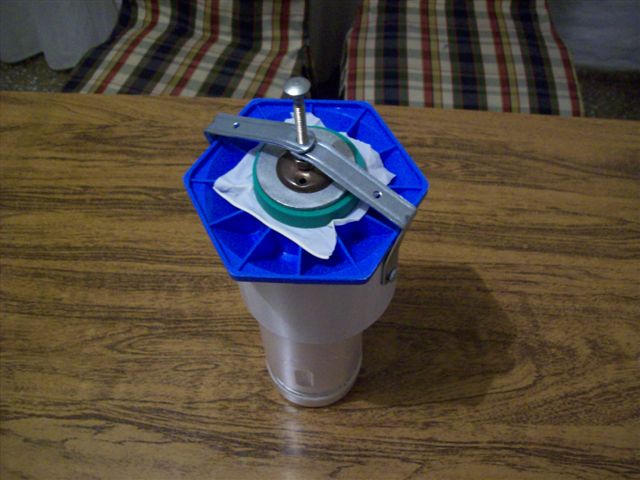
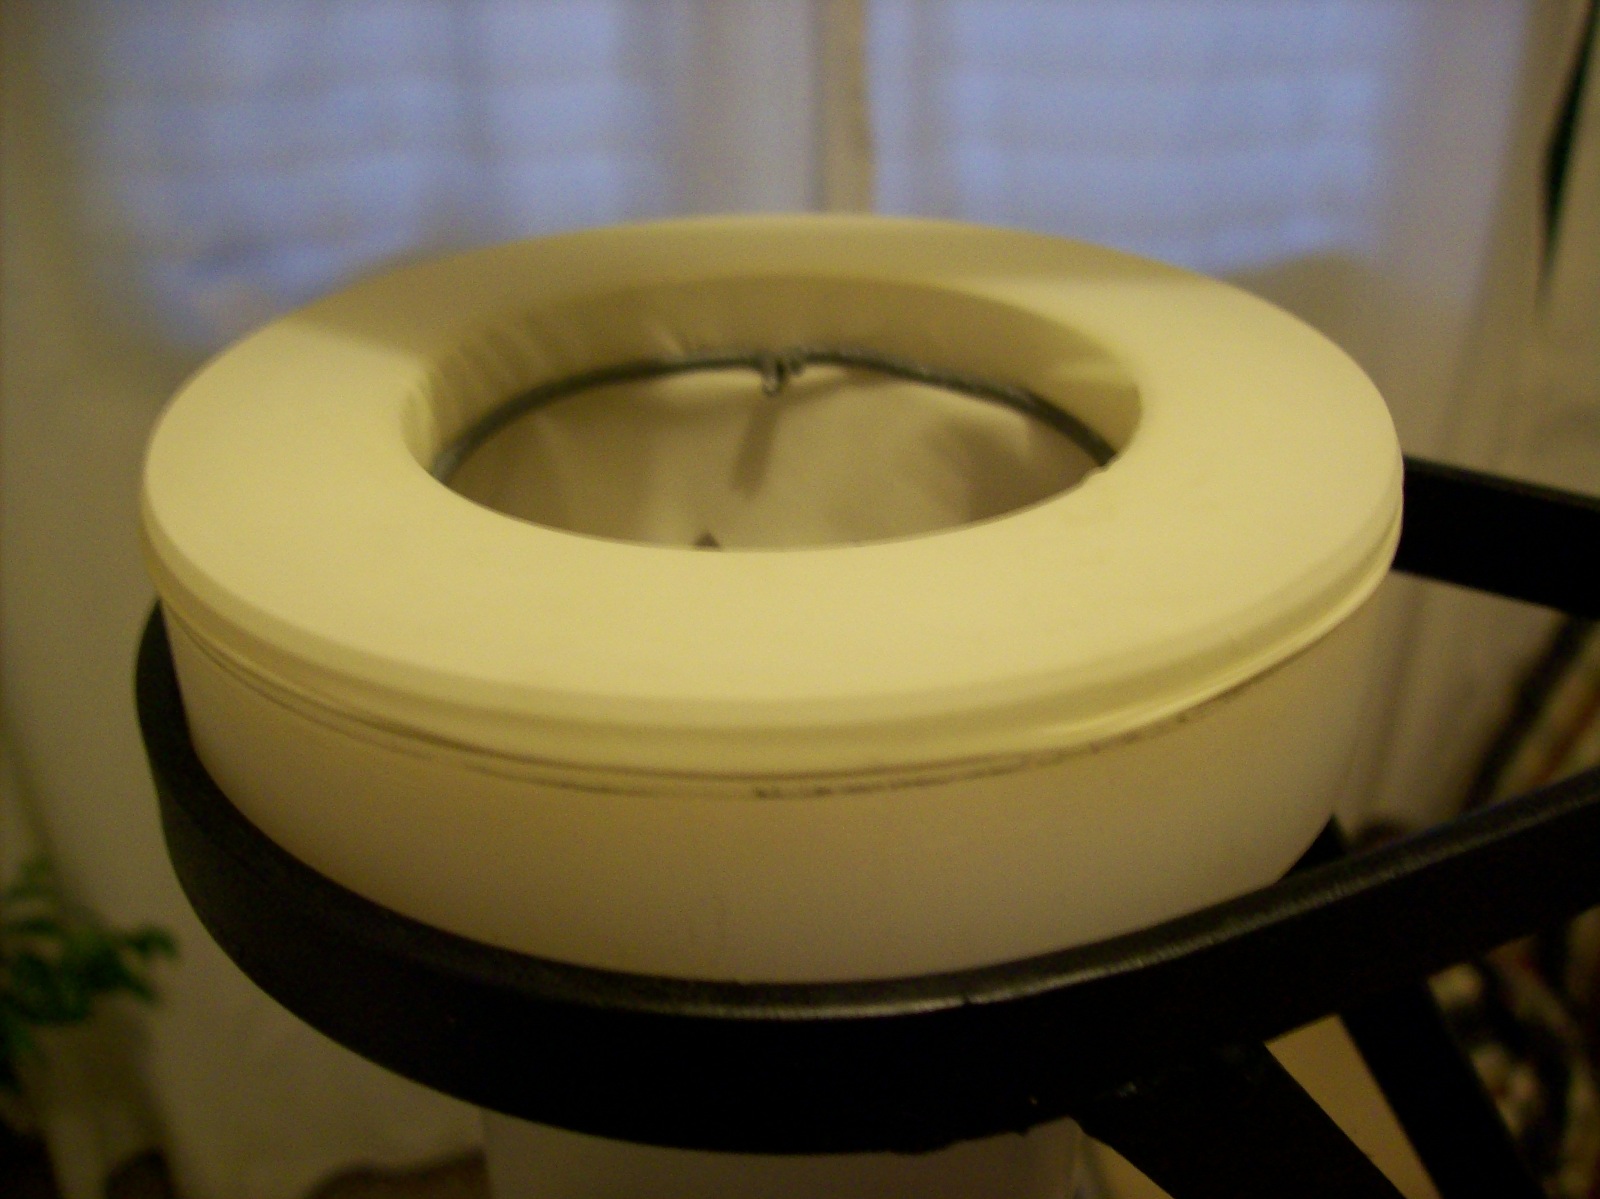 View from the top of the porosimeter (version 2009). The two metal seats are turned and sheathed in latex. Some grooves carved into the sides (internal and external) are used to determine the latex with the inner metal ring and rubber band to the outside. This ensures formidable resistance and a large soft tissue for testing. Works perfect. |
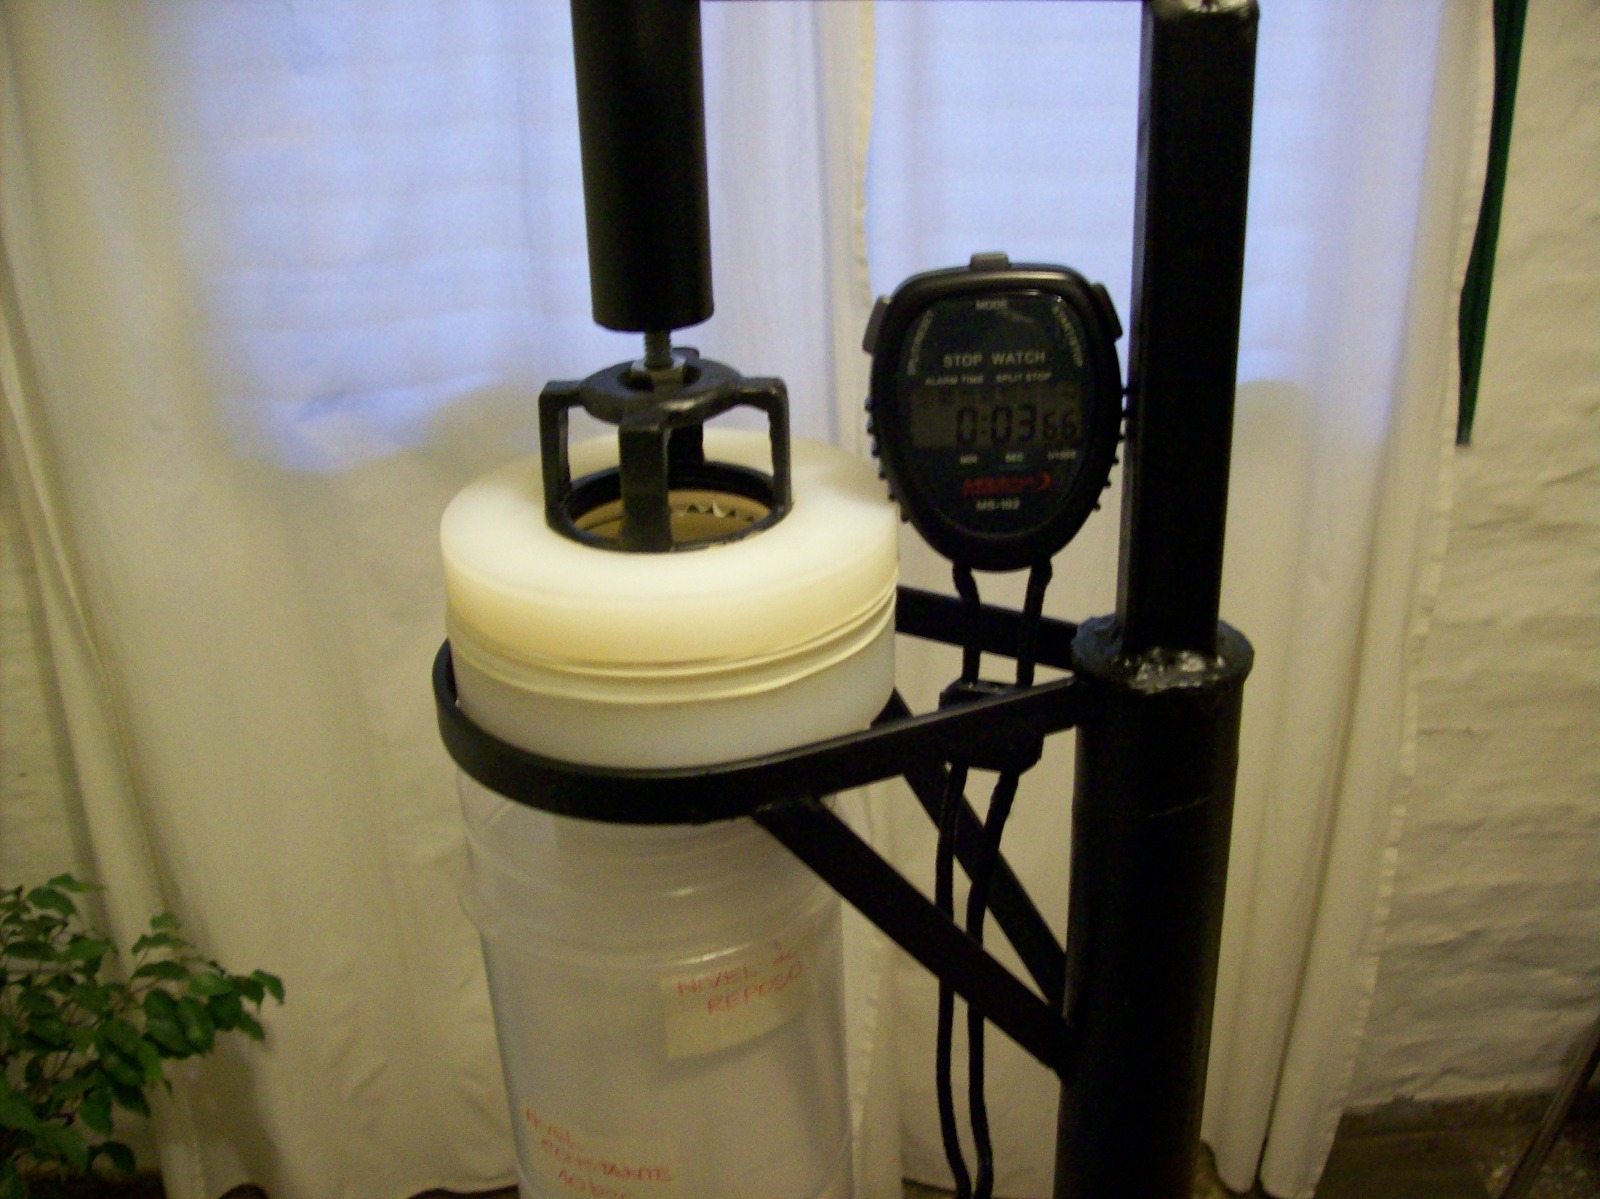 Porosimeter CZWings (version 2009), fixed at a support column. A digital stopwatch was used to obtain the test results. Very practical compared to the previous one. Ensures comfort and precision. |
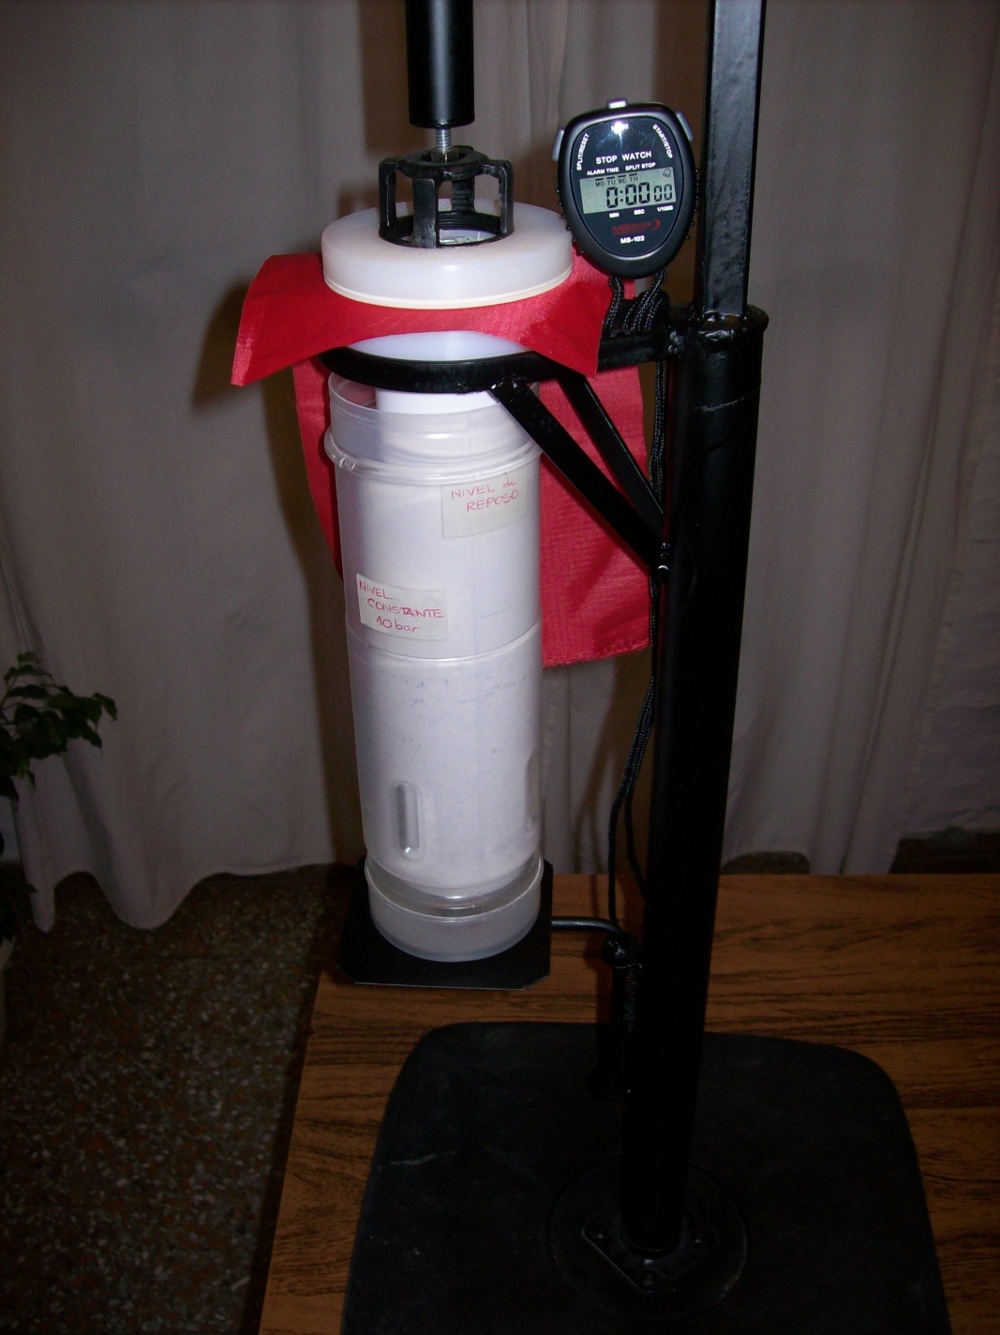 Porosimeter CZWings (version 2009): Porosimeter CZWings (version 2009):Full view of the porosimeter ready to lower the water tank and start the test. This porosimeter works in reverse as the previous model (2008): The tank descends, and the cylinder is fixed. Is simpler and is no need to move the tissue. |
|
 |
 |
4. Corrections by temperature and atmosferic pressure or altitude
The measurement ends when the porosimeter have added 250 ml of air. But what is exactly 250 ml of air? We can consider that 250 ml of air is the air that occupies a geometric volume of 250 ml in an standard atmosphere at sea level, at a latitude of 45 degrees and an atmospheric pressure of 1013.25 mbar.
The state of an amount of gas is determined by its pressure, volume, and temperature. The modern form of the equation is:
PV = nRT
where P is the absolute pressure of the gas; V is the volume of the gas; n is the amount of substance of the gas, usually measured in moles; R is the gas constant ; and T is the absolute temperature.
At the sea level, Patm=1013,23 mbar, lat=45º, T=0ºC=273ºK :
PoVo=nRTo
In an other temperature and pressure (or altitude):
P1V1=nRT1
When T increases V increases. When P increases V decreases.
The porosimeter measured time, which is directly proportional to the volume of air. Then it is necessary to apply a correction factor that takes into account the air that actually exists at the site of measurement.
At high temperatures (above 0 º C) the air expands and the measured geometric volume, does not correspond with the amount of air that would be obtained at 0 ° C. We must apply a correction coefficient for temperature:
Kt = (273 + T (º C) ) / 273
A high pressure (above 1013.25 mbar) the air is denser and the measured geometric volume, does not correspond with the amount of air that would be obtained in a normal atmosfere. We must apply a correction factor for barometric pressure (or height):
Kp = 1013.25 / P (mbar)
Then the value of time corrected by temperature and pressure in the measurement local site is:
Tcorrected=T x Kt x Kp
This correction should be applied to any type of porosimeter either water piston or other type (including Skywach). The result of the correction can reach extreme values of 20%, even so, it was not fully significant in most cases. Be considered in the case of obtaining porosity values near the limit of use.
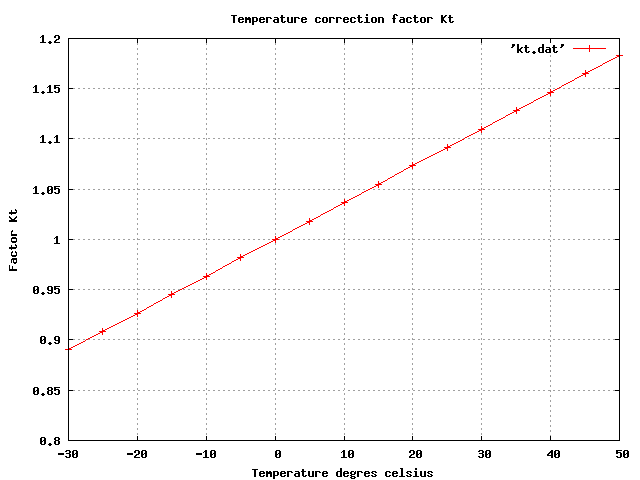 | T(ºC) Kt -30 0.890110 -25 0.908425 -20 0.926740 -15 0.945055 -10 0.963370 -5 0.981685 0 1.000000 5 1.018315 10 1.036630 15 1.054945 20 1.073260 25 1.091575 30 1.109890 35 1.128205 40 1.146520 45 1.164835 50 1.183150 |
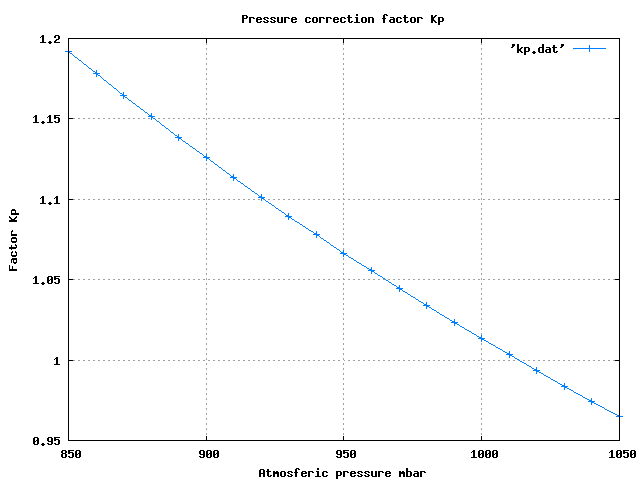 | P(mbar) Kp 850 1.192059 860 1.178198 870 1.164655 880 1.151420 890 1.138483 900 1.125833 910 1.113462 920 1.101359 930 1.089516 940 1.077926 950 1.066579 960 1.055469 970 1.044588 980 1.033929 990 1.023485 1000 1.013250 1010 1.003218 1020 0.993382 1030 0.983738 1040 0.974279 1050 0.965000 |
Please sent comments or corrections, if necessary, to info @ laboratoridenvol . com .
5. References:
[1] JDC Skywach MK-1 porosimeter http://www.jdc.ch/site/index.php?option=com_deeppockets&task=contShow&id=92&Itemid=332
[2] Water piston porosimeter information http://pg.c2.hu/articles/Szakirodalom/Szakcikkek/Porosity_check/Porosity_check.html
[3] Paragliding forum dicussion "Measuring porosity" http://www.paraglidingforum.com/viewtopic.php?t=20381